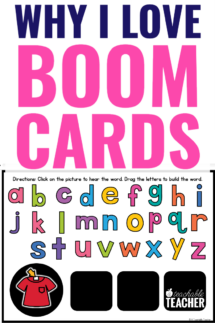
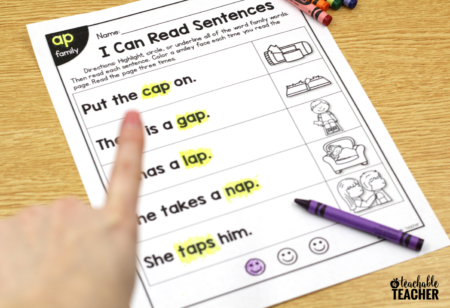
Did you know there is a digital learning tool that allows teachers to create and/or purchase interactive digital activities for their students? Think of it as engaging digital task cards. Let me introduce you to Boom Learning Cards!
A note about this blog post:
I’m not endorsed or sponsored by Boom Learning. This blog post is 100% the result of my opinion and experience with Boom Learning.
What are the Benefits of Boom Learning?
Boom Learning Cards have a ton of great benefits for you and your students. Boom Learning Cards:
- Are simple to find and/or create.
- Allow you to differentiate for your students’ needs.
- Are self-checking.
- Require ZERO paper and copying.
- Is a kid-friendly platform with rewards and positive reinforcement.
- Encourages independence.
How to Use Boom Learning Cards
Getting Started With Boom Learning
Below, I am giving you step-by-step instructions for how to create your Boom Learning account and get started with using these digital cards in your classroom and in your distance teaching.
Boom Learning Lingo
Before I dive into the step-by-step process for getting started with Boom Learning Cards, I want to tell you a little more about some of the lingo you will see and what it means in the Boom world. This will also help you decide what type of membership will be best for you and your classroom.
- The amount of classes you can create within Boom Learning is called a section. For self-contained classroom teachers, you may just need one section. However, you can create multiple sections to help you level your students and tailor assignments to their needs.
- Boom Cards come in groups of interactive task cards called decks. Each deck focuses on a certain standard or skill-set. You can purchase Boom decks from the Boom store, from Teachers Pay Teachers, or other teacher stores. You can also create your own Boom decks which are called private decks. If you would like to create decks to sell, you will need an Ultimate Boom Learning membership to create these public decks.
- When you set up your membership, you will receive a certain amount of points. You can use these points to purchase Boom decks from the store. When you have no points left, you can go to the store to purchase more points.
Step 1: Create a Boom Learning Account
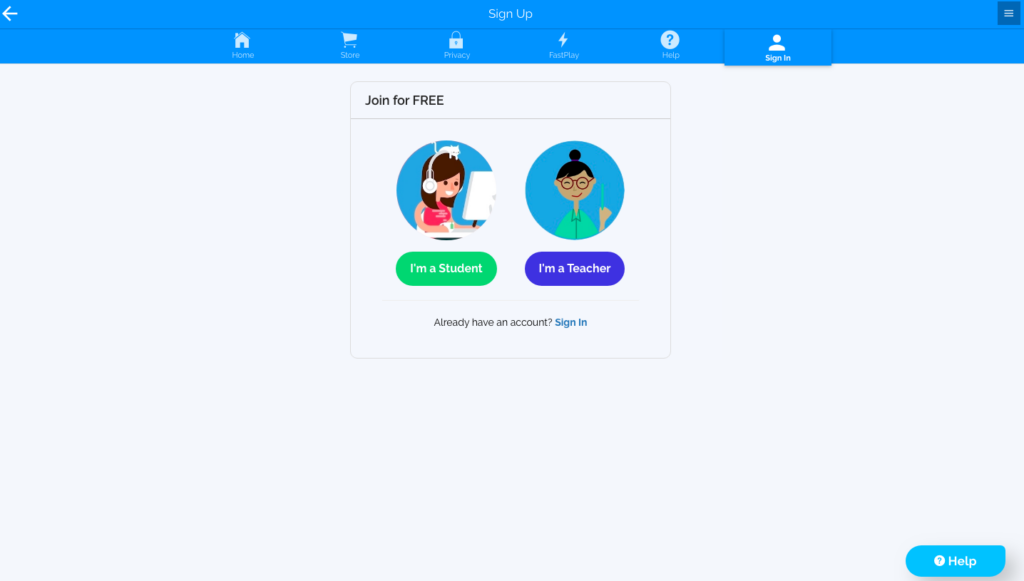
First, go to the Boom Learning website and create a free account by clicking “Sign In.”
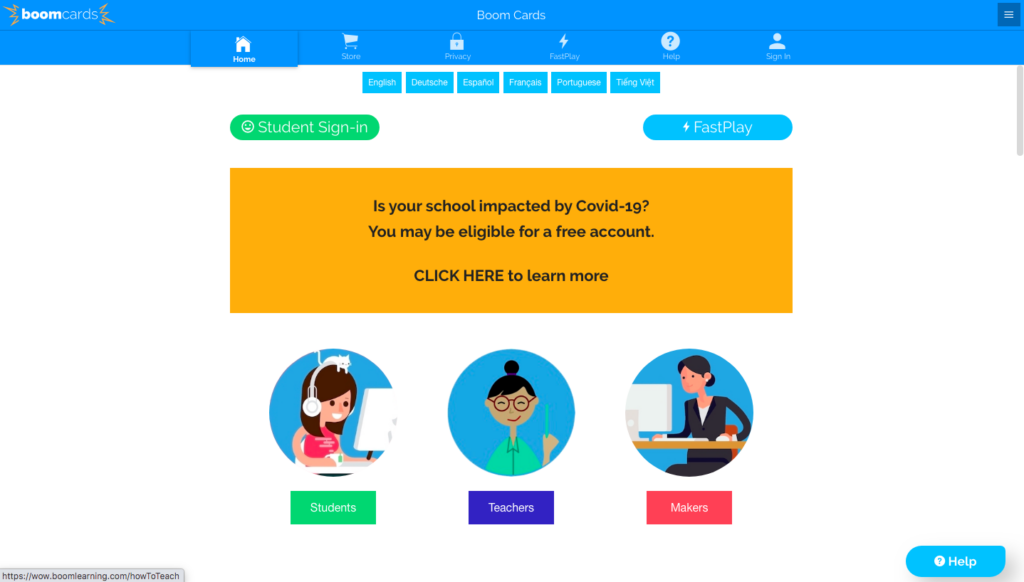
Next, click “Join for Free.”
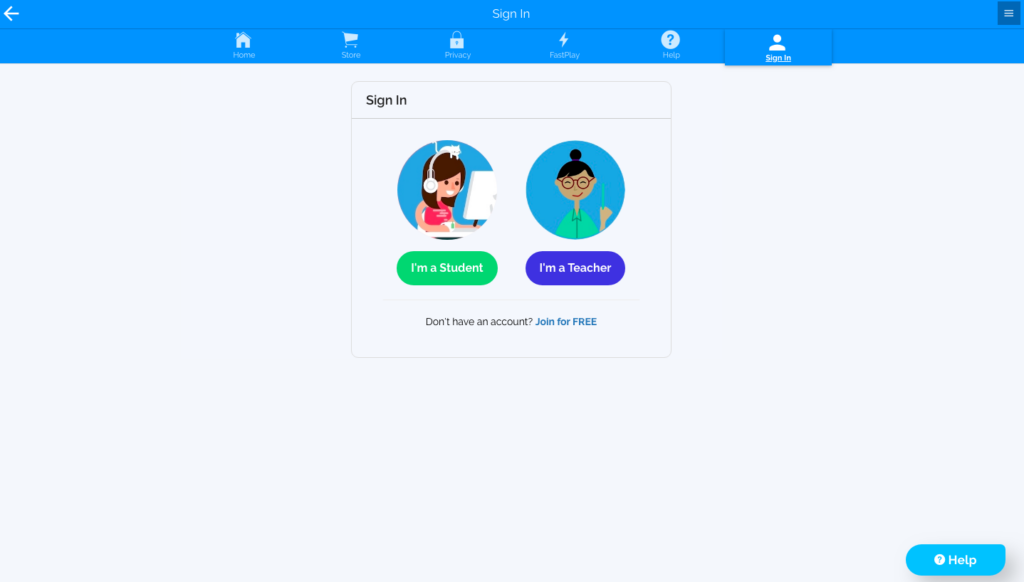
Select, “I’m a Teacher.”
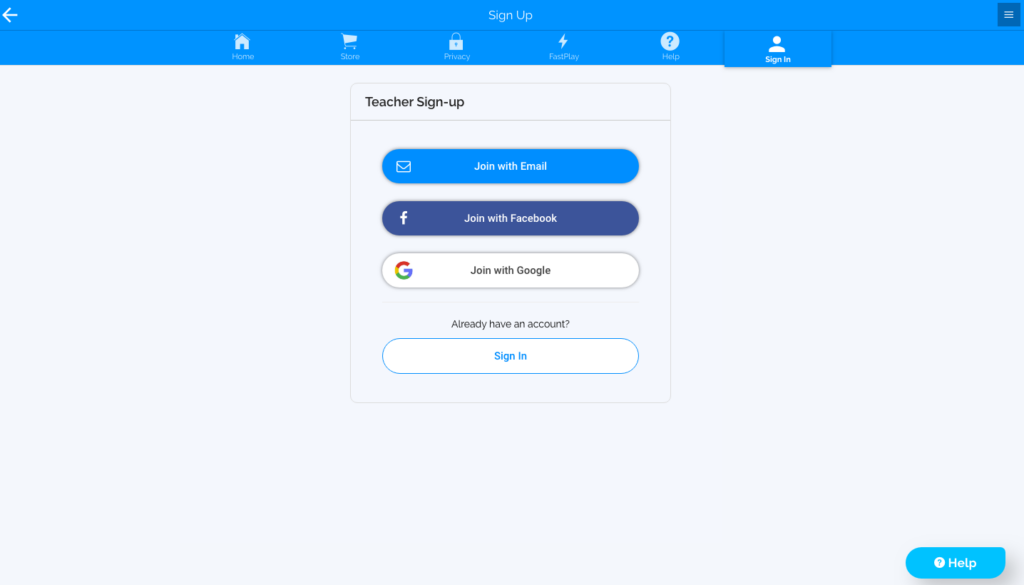
Choose how you would like to join.
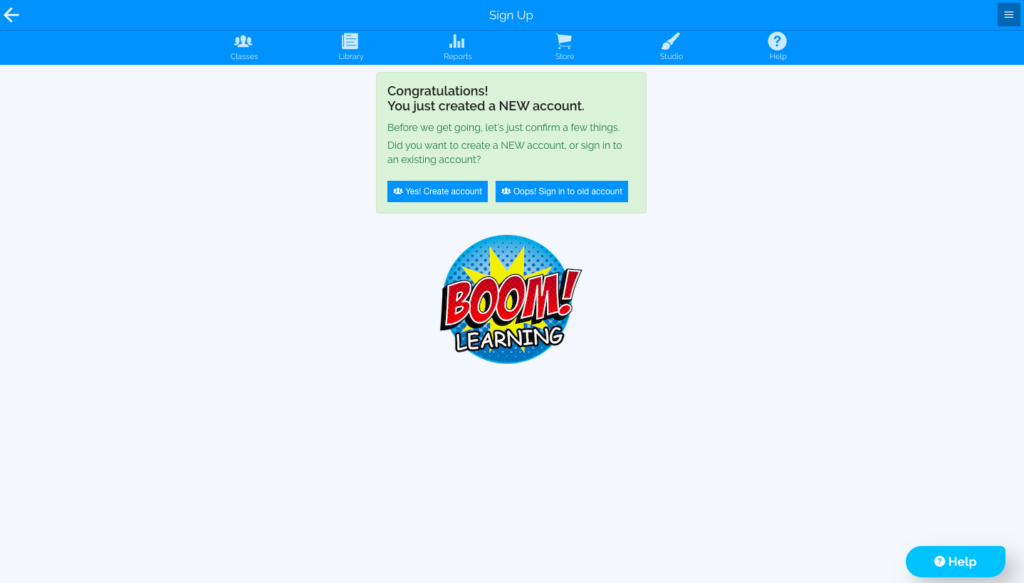
After entering your information, select, “Yes! Create account.”
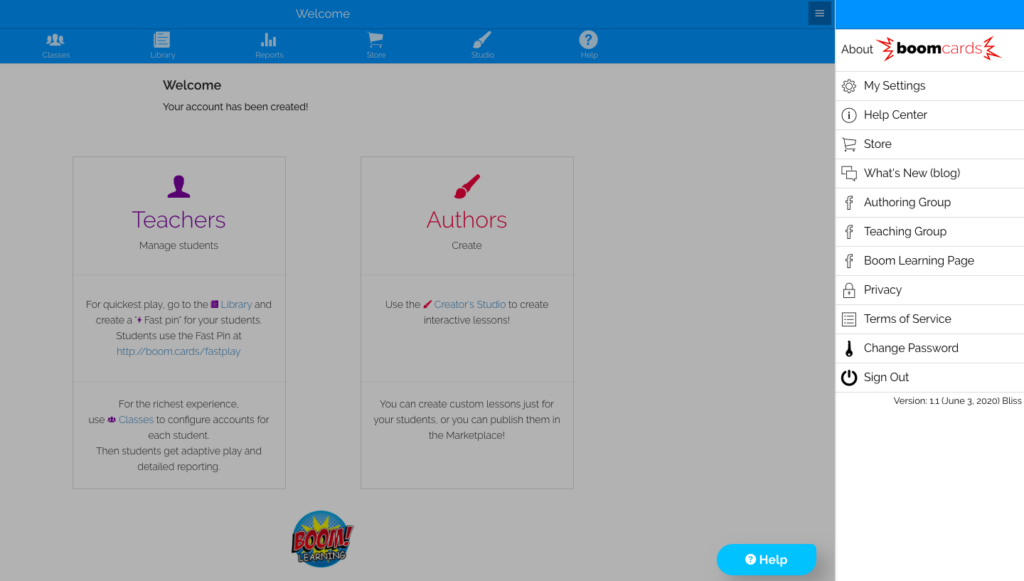
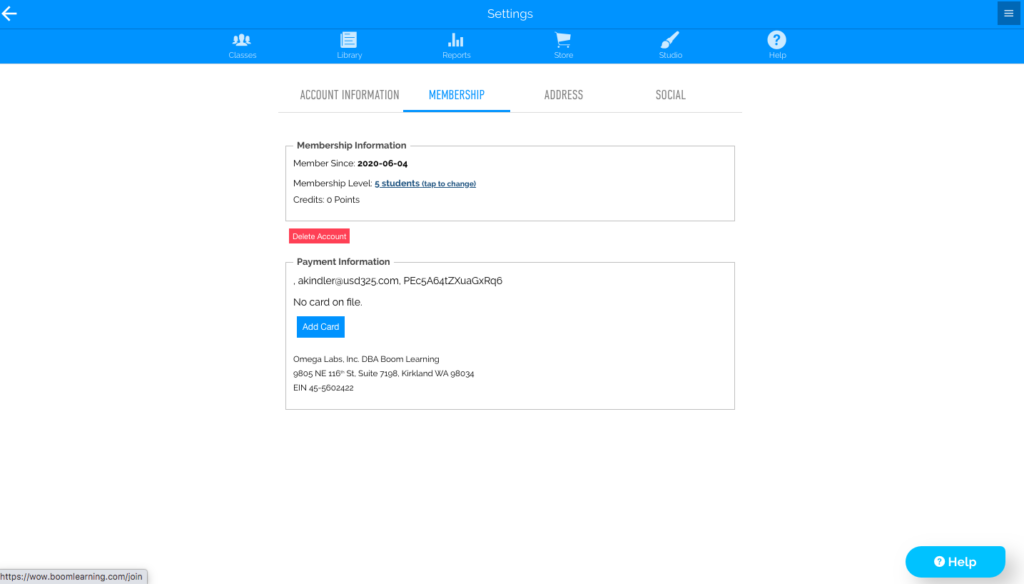
You can select “My Settings” by clicking the button on the top right to view your account and membership.
From there, choose “Membership” and then click on “tap to change.” if you would like to upgrade your membership.
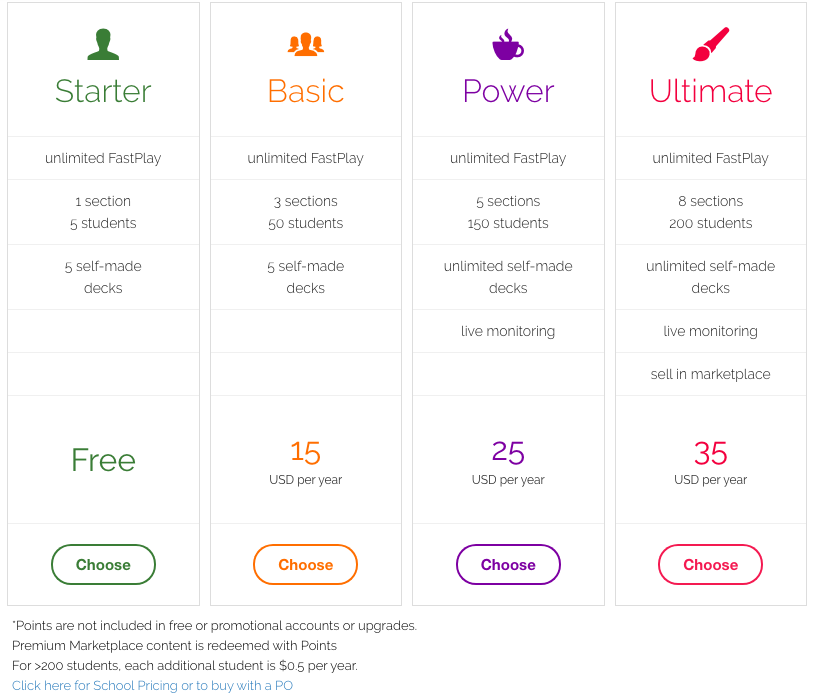
You may choose to continue with a free Starter account or upgrade. Here are the different membership options.
Step 2: Set Up Your Classroom
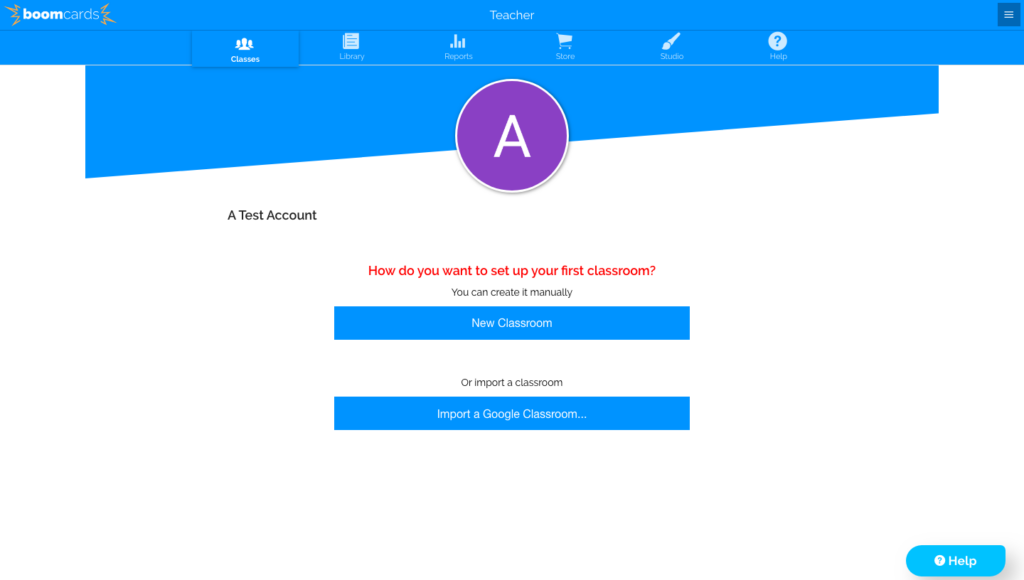
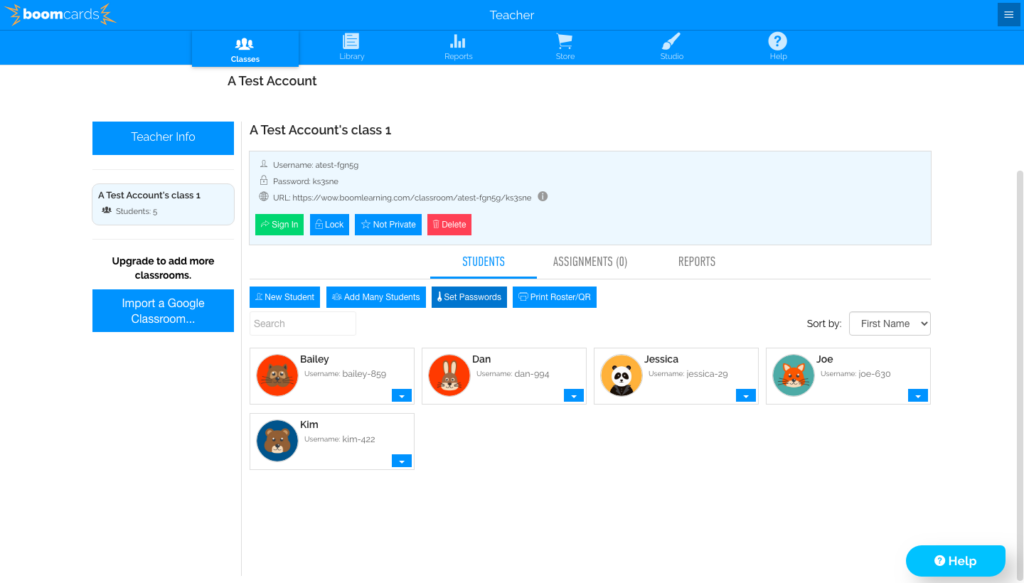
To set up your classroom, click on the “Classes” tab at the top right of the screen. Then click “New Classroom.”
You can add students one at a time by clicking “New Student,” or add multiple students at once by clicking “Add Many Students.”
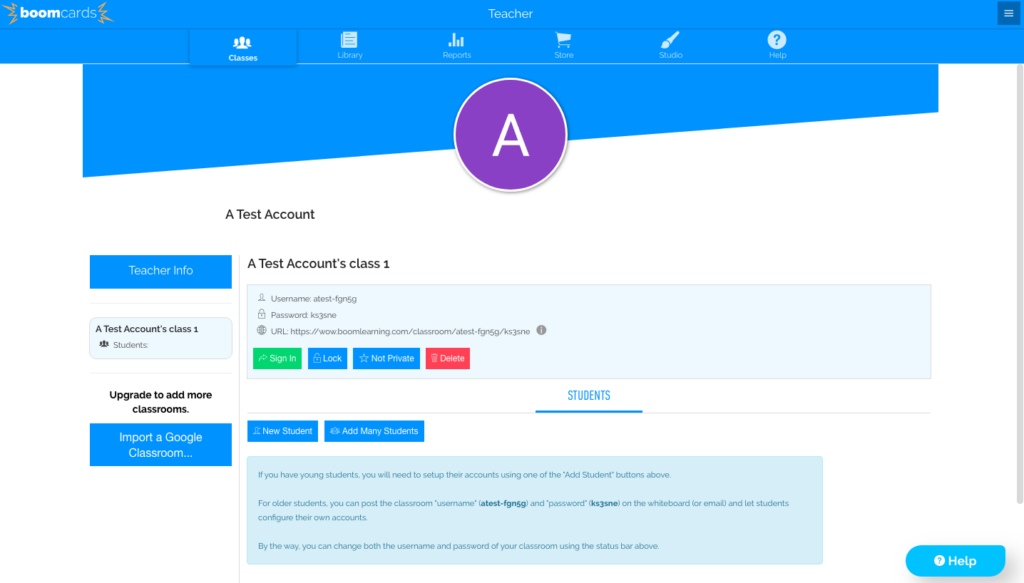
You will set their usernames and passwords during this step. Each student will be given an avatar, which can be changed when the students log-in to their account.
Step 3: Download Boom Card Decks
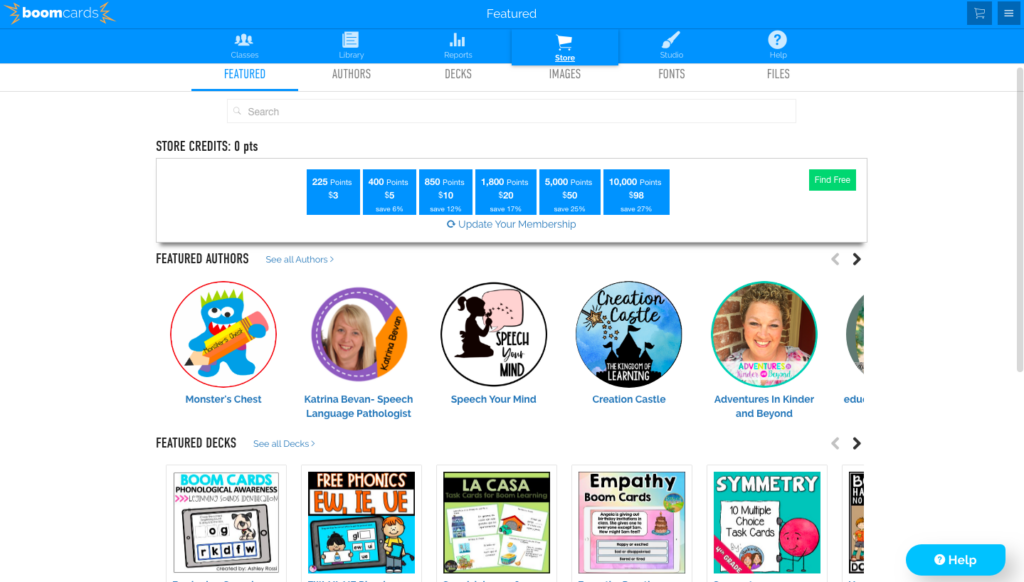
Like I mentioned above, you can find Boom Learning Cards to download in the Boom Learning store or on sites such as Teachers Pay Teachers. To browse the Boom Learning store, click on the “Store” tab at the top of the page. Here, you can see how many store credit points you have. You can sort through by points required, subject, grade-level, author, etc.
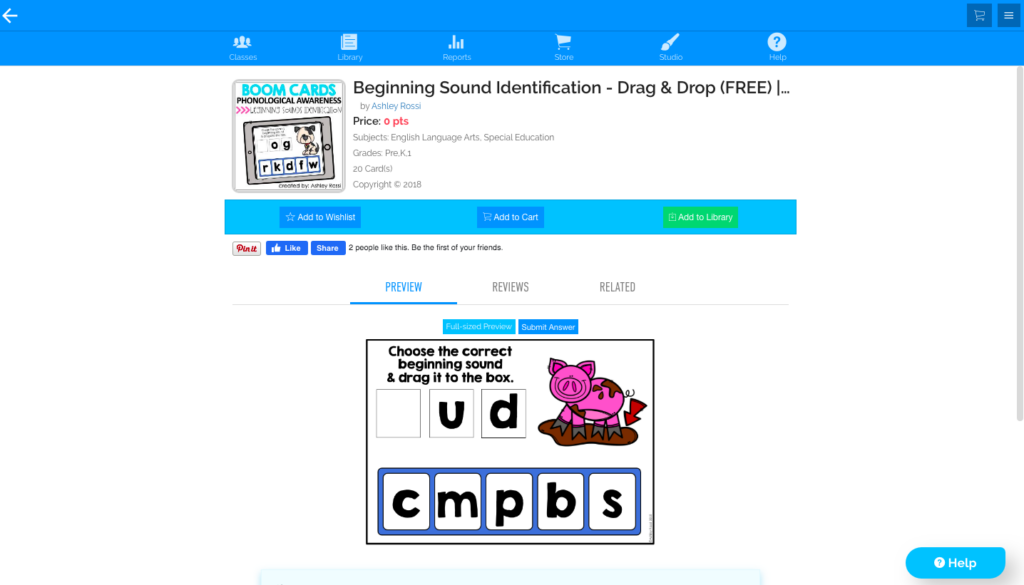
Once you find the deck you want, click on it and then click “Buy Now” if it requires points or “Add to Library” if it is free.
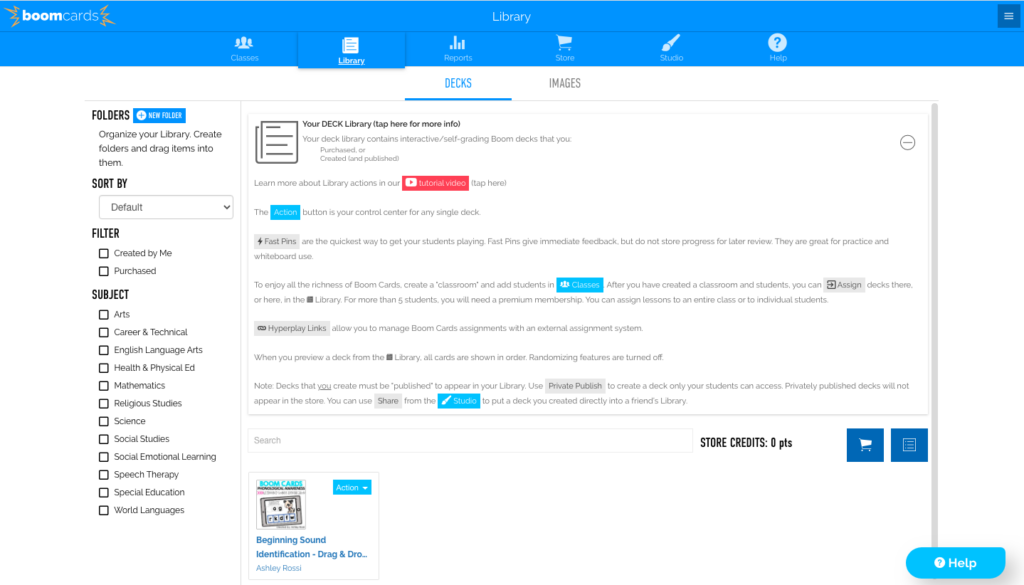
Once your purchase or free download is complete, the deck will be stored in your “Library” tab located at the top of your screen.
Step 4: Assign Boom Card Decks to Your Class
Now you are ready to assign the deck to your students and get the party started! Click the “Action” drop-down arrow on the deck you wish to use in your library.
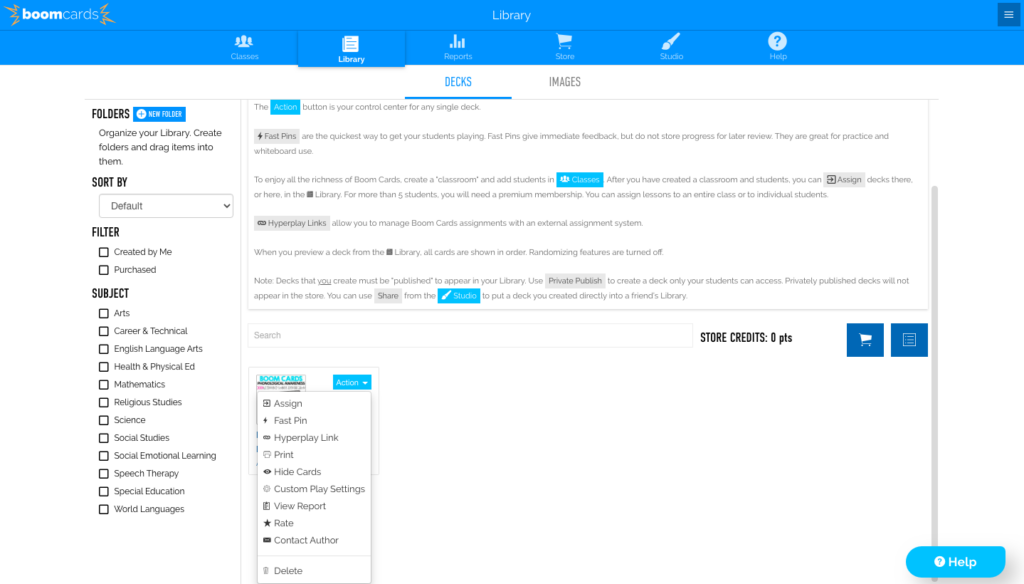
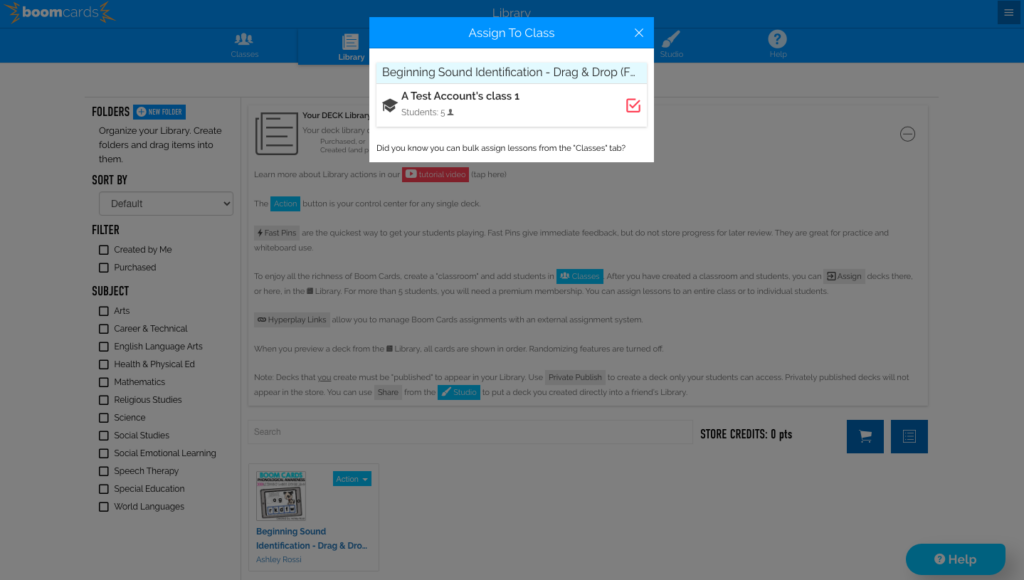
Then click “Assign,” and select the class you wish to assign it to.
You can differentiate instruction and assign it to individual students as well. To do this, go to the “Classes” tab, click inside the class you need, and then click the drop-down arrow next to the student’s name.
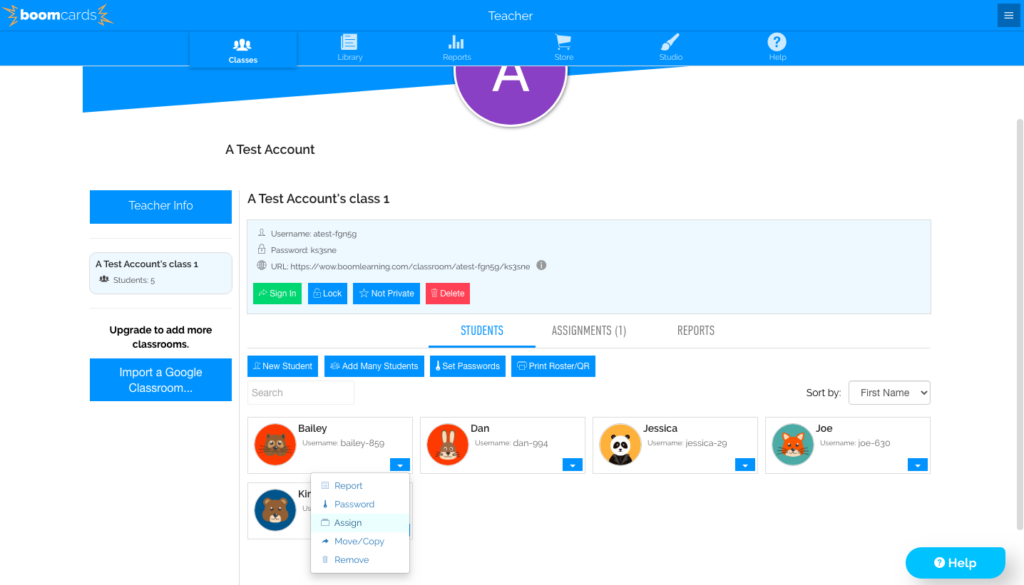
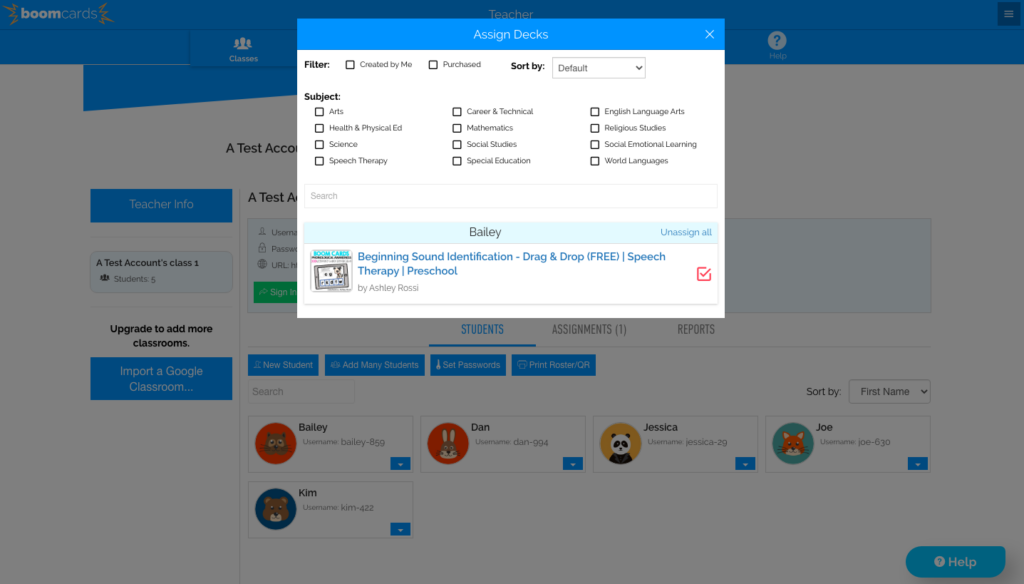
Click “Assign” and select the deck you wish to assign to that student.
Other Features of Boom Learning Cards
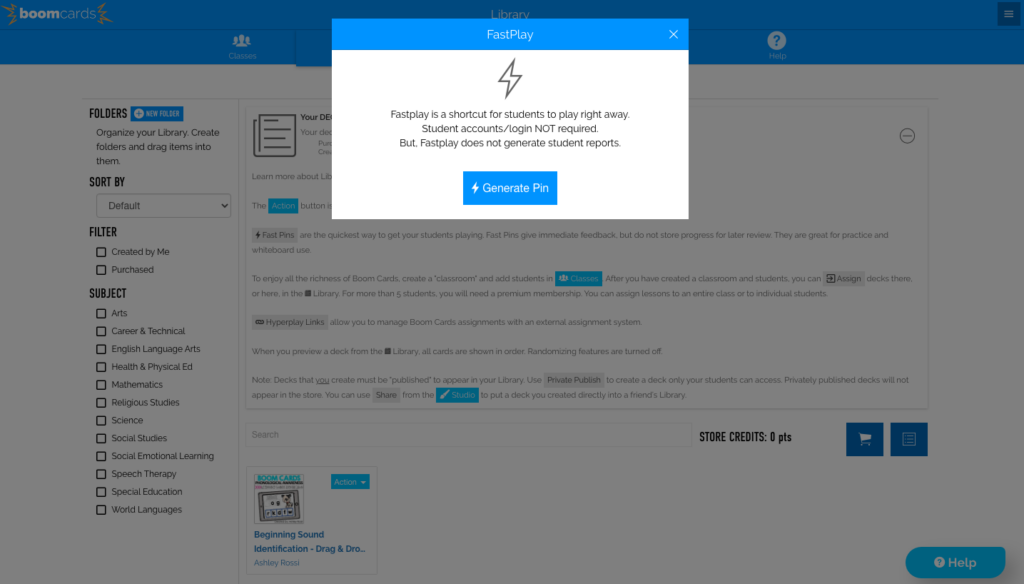
If you would like to give your students access to Boom Learning Card decks without having to log-in to their account, you can select “Fast Pin” from the drop-down arrow. The only downside to this is you will not get reports on student work.
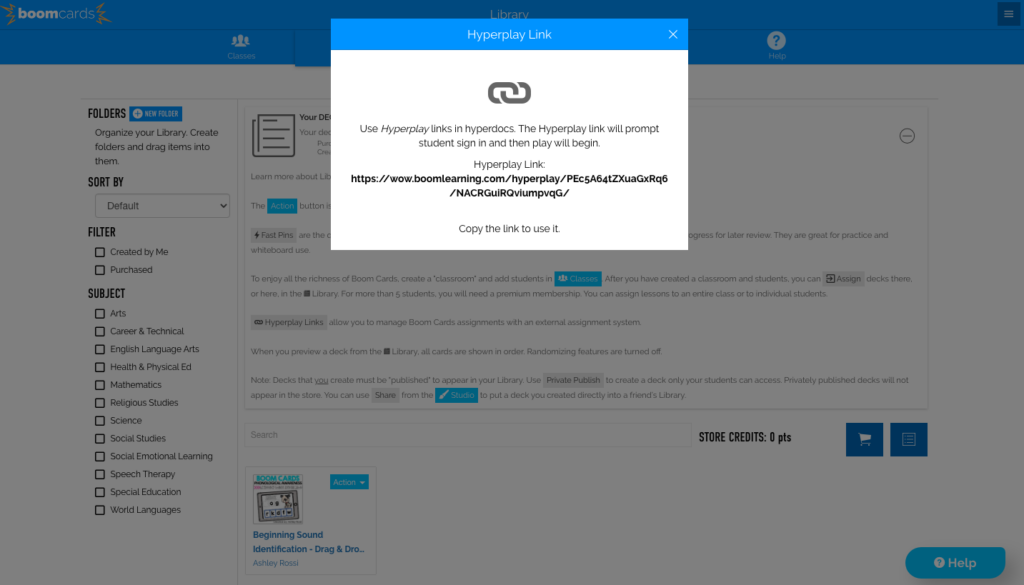
To link a specific deck of cards in another document, you can click “Hyperplay Link.”
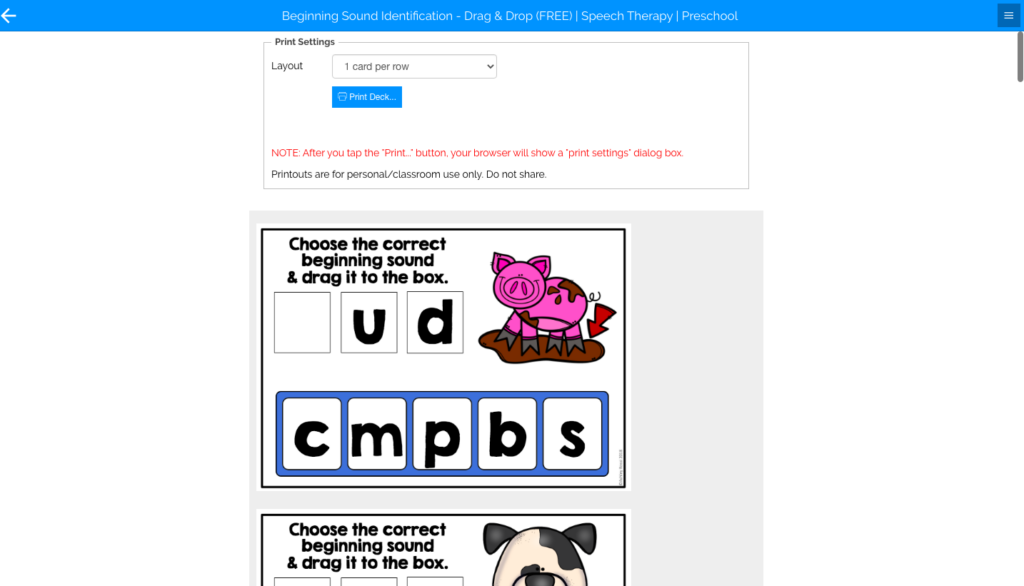
To print the Boom Learning Card deck in PDF format, select “Print.”
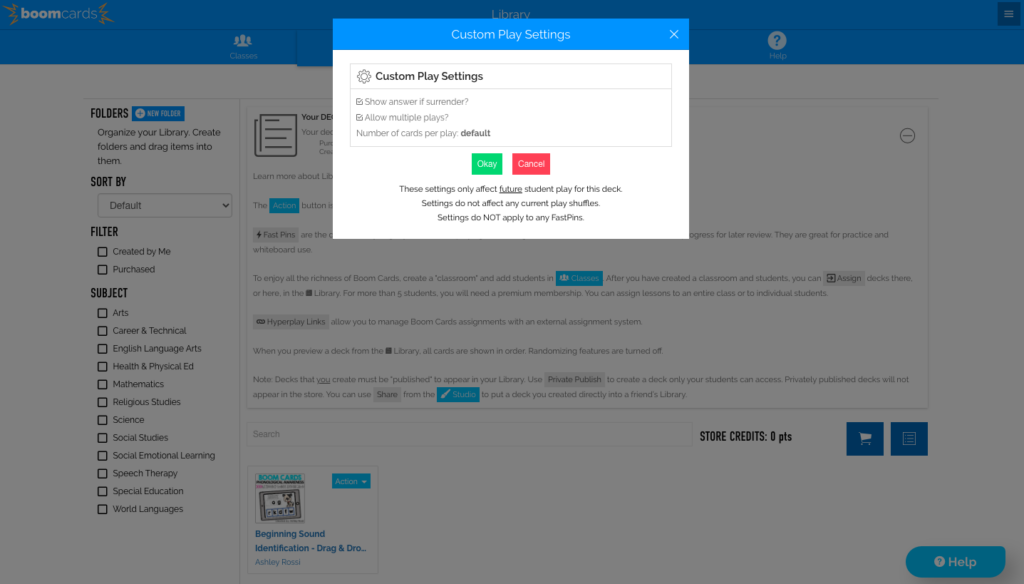
You can select different settings for custom play, such as showing the correct answer if the student answers incorrectly or allowing the students to play the deck multiple times by clicking “Custom Play Settings.”
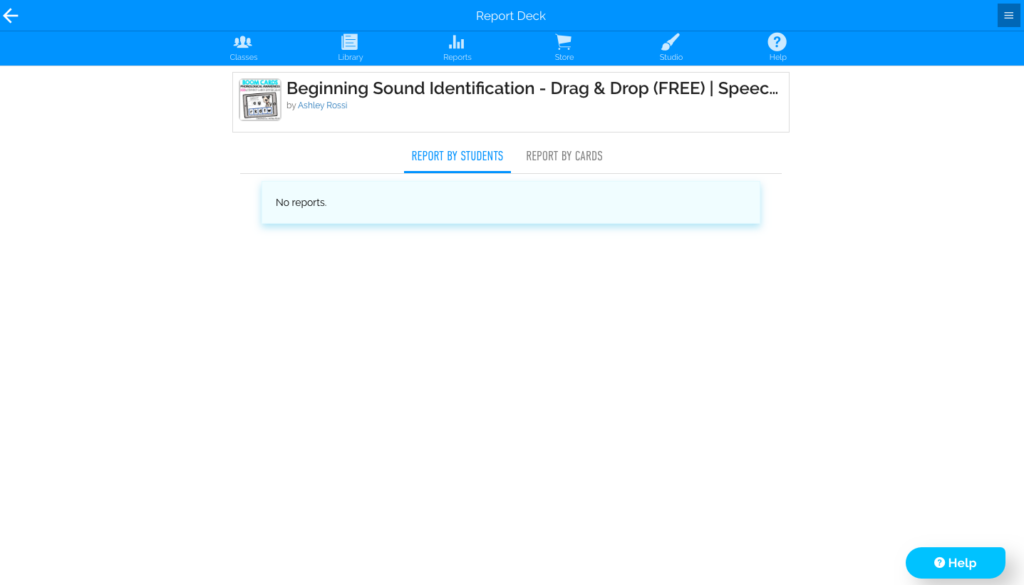
To access your students’ reports and stats for each deck, click “View Reports.”
Step 5: Get Student’s Access
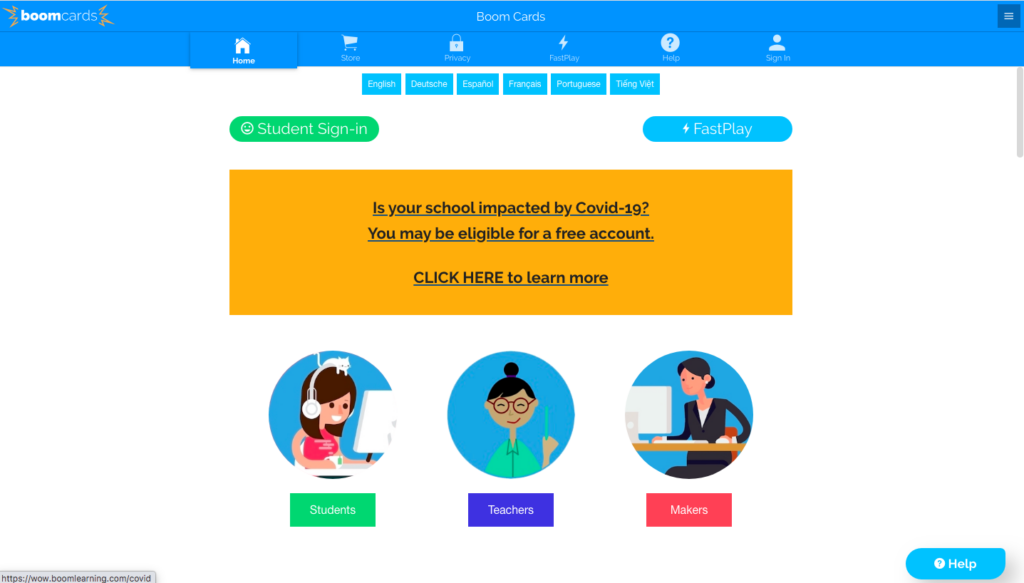
Now that you know how to set-up your class, download, and assign Boom Learning Card decks, it is time to get your students logged in. To do this, go to the Boom Learning website and have the students click on the green “Student Sign-In” button.
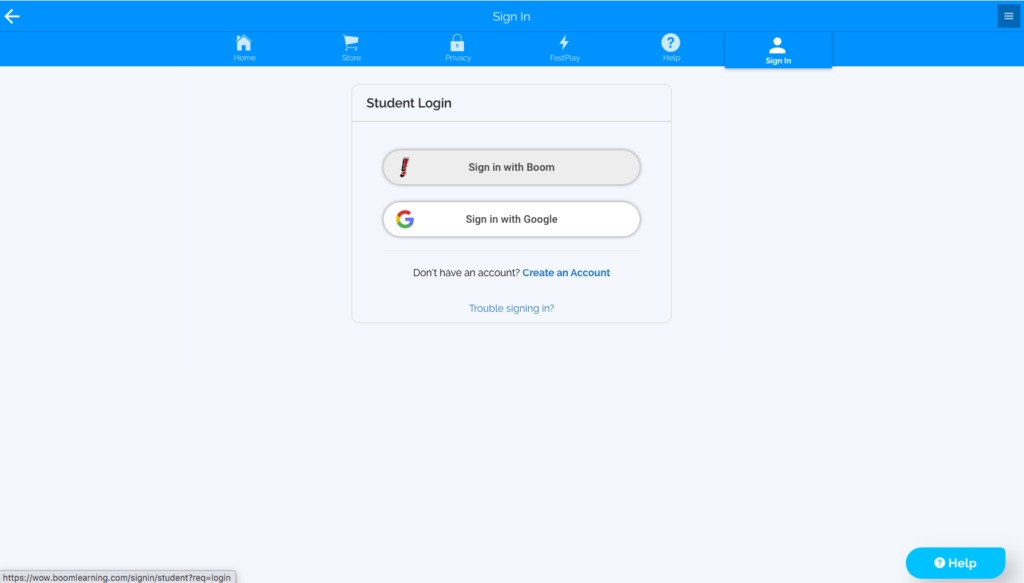
Next, have then click “Sign in with Boom.”
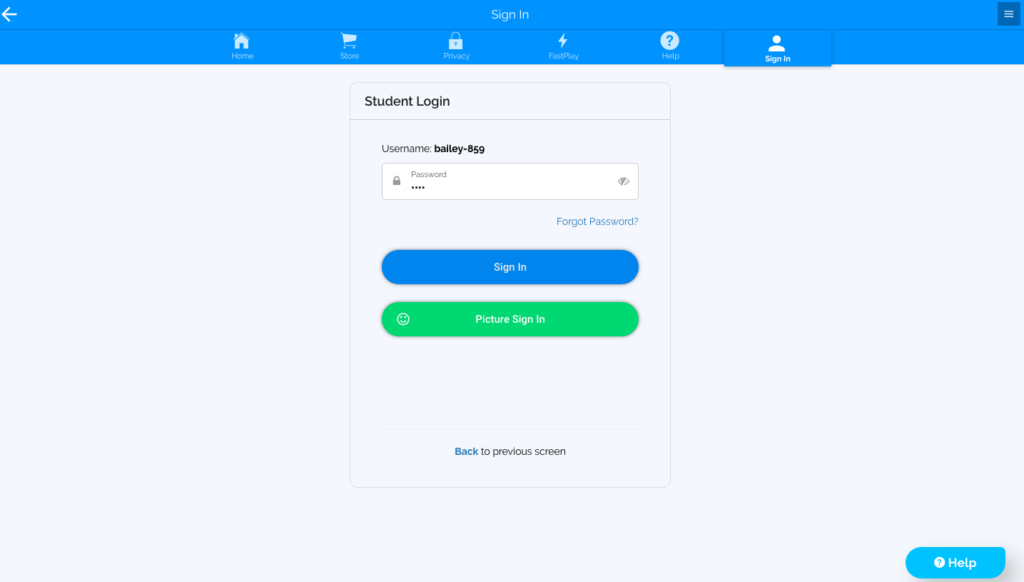
They will enter their username, click “Next,” enter their password, and then click “Sign-In.”
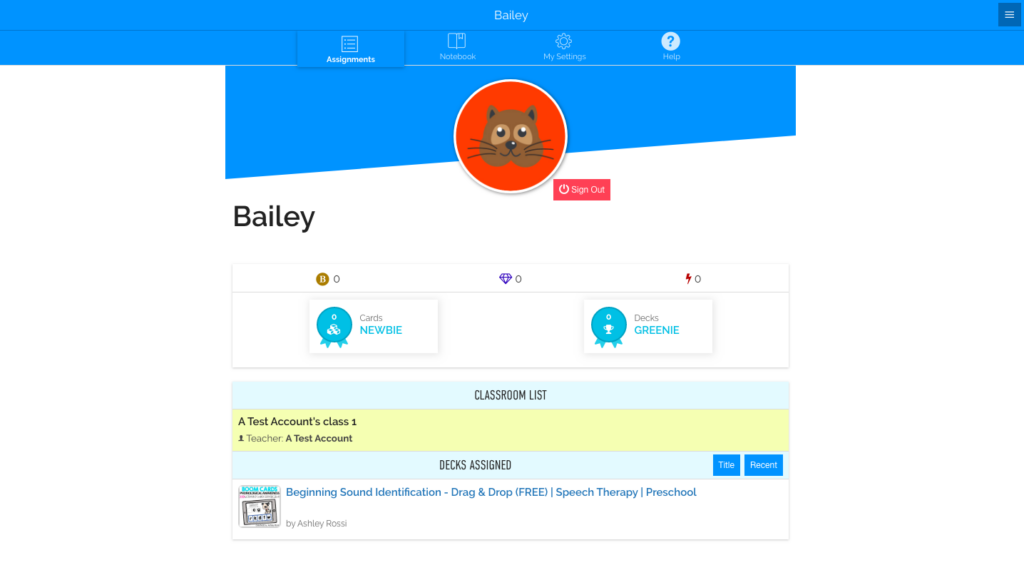
From here, they will see in their portal any decks that have been assigned to them. To play, they will simply click the deck.
Step 6: View Student Reports
Once the students have completed the deck, you can view their stats by clicking the “Reports” tab and clicking on the assigned deck.
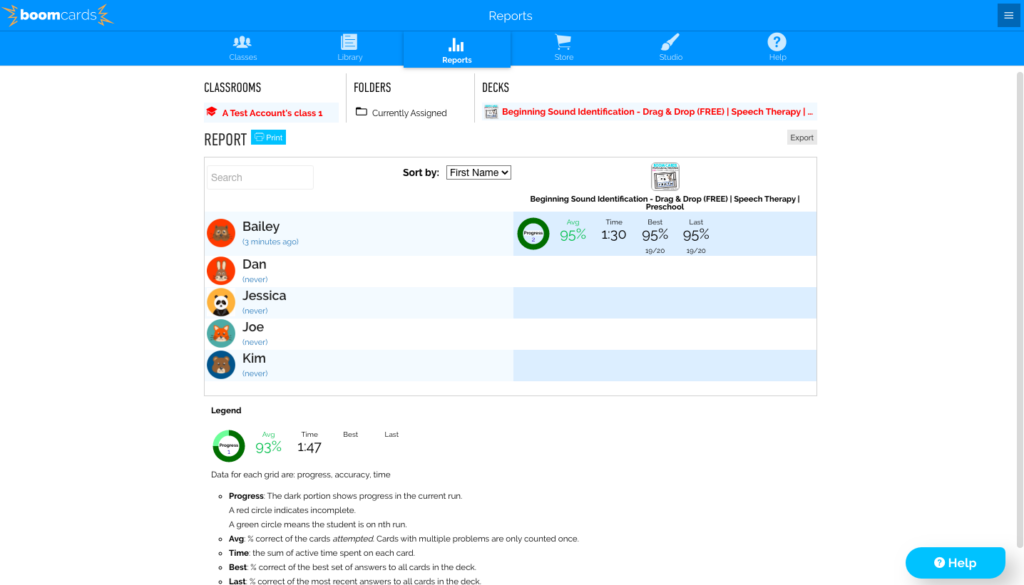
This allows you to see their progress, average percentage and the time it took them to complete. If they have played the deck more than once, you can also view their best set of answers and their last set of answers.
Final Thoughts on Boom Learning Cards
Doesn’t Boom Learning sound fun? It truly is! Your students will love these interactive task cards and they are sure to transform how you and your students use technology. Boom Learning Cards are also great to use during distance learning or for your students to do at home over the summer or other school breaks.
If you have any Boom Learning tips or decks that you love, please share them in the comments!
Boom Learning Tutorials
As I am not a Boom Learning affiliate, I am simply giving you information and insight based on my own experiences with this tool. If you have additional questions or would like to see Boom Learning tutorials, check them out at the Boom Learning Support section and on their YouTube channel!

